
Everyone wants to feel more in touch with nature, but a lack of space kills the dream. Not everyone has time for regular escapes to parks or the countryside, and there’s no yard in a small city apartment. How are you meant to get more greenery into your life, which we’re so often told is good for us?
The answer lies, or rather stands, in DIY vertical gardens. This guide explains exactly how to set one up, enabling you to live more mindfully and calmly, no matter how little room you have.
Step 1: Choose the Right Location
In a small space, this shouldn’t take long because there aren’t many options. However, choosing the right location doesn’t mean picking your favourite spot. You must choose somewhere that gets sufficient natural light during the day; that’s at least four to six hours. Otherwise, you will need to install grow lights, and you will need to pick a spot near a power outlet. Choose somewhere where spilling a little water won’t do much damage, either.
Step 2: Decide What to Grow
You can decide what plants to grow based on two things: the conditions they’ll be growing in and your personal goals for your DIY vertical garden. If light is an issue, then plants like ferns and pothos are ideal. If visual appeal is your goal, then you might choose flowering plants like petunias or begonias. If you want something more practical, you can grow herbs like basil, mint and parsley to use while cooking.
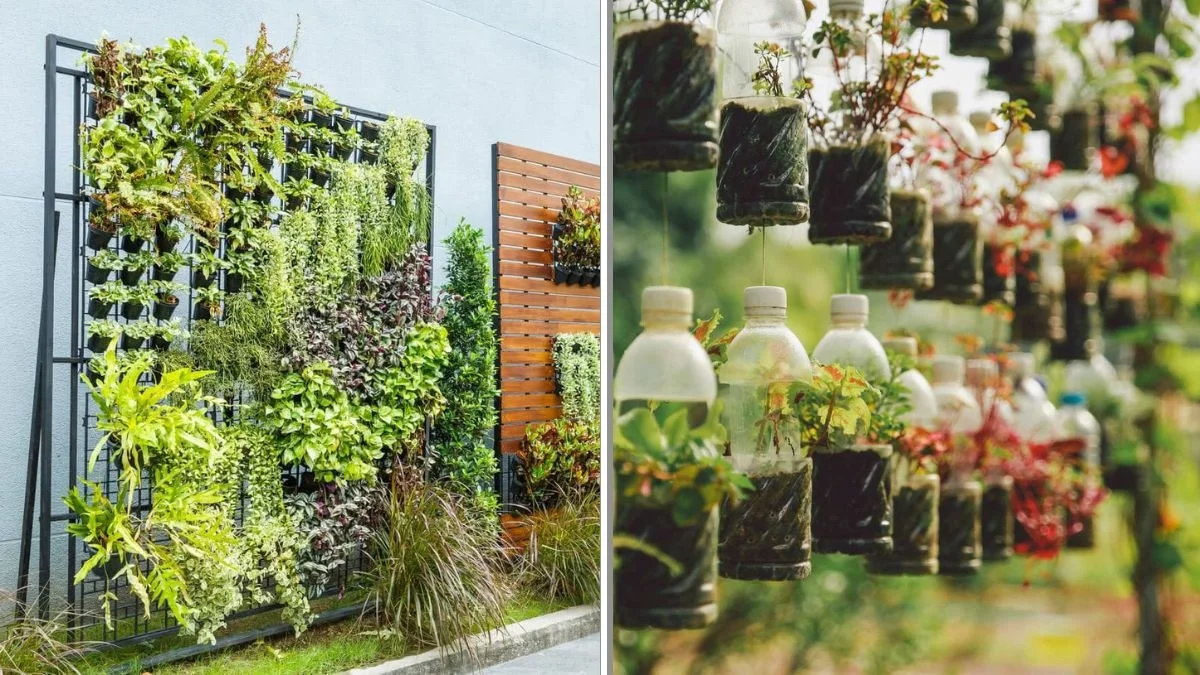
Step 3: Select Your Structure
Unlike landscaped or vegetable gardens, you don’t need an excavator to get started with a vertical hydroponic garden. But it does need a structure to hold it in place on the wall. Some popular choices are wooden pallets or shelves, but you can use basically anything that the plants can hang off of. There are also modular systems that give you the option to expand your vertical garden into a green wall over time.
Step 4: Putting Everything Together
Start by securing your structure to the wall to prevent it from tipping over and causing chaos. Ensure that it is fastened strongly enough to support the weight of the hanging plants. Then, you can start adding your vertical garden planters and pots. Fill them with high-quality soil, as this will prevent them from leaking as much when you water them. Finally, plant each species at an appropriate depth, placing taller plants near the top.
Step 5: Watering and Maintenance
Regular watering by hand should be sufficient for small gardens, but there are automated solutions for hydroponic vertical gardens. You’ll need some kind of drip irrigation system so that the water passes through all the soil and comes out the bottom of the pot. Depending on the plants you choose, you may also need to prune them occasionally to keep them tidy and encourage them to grow.
Conclusion
A DIY vertical garden is an efficient way for people in small spaces to feel more in touch with nature. They’re easier to create and maintain than outdoor gardens, and can be easily customised to suit any home.